Posts

Use These Tips to Make Your Next Logo Design

When I relaunched New Inceptions in 2015, one of the things that I knew I had to do was make a new logo. Not only was the one I had outdated, but I didn’t really know where the original Photoshop file went.

ni-logo-progression

Between the first iteration of the logo and the current version, I’ve learned a thing or two about logo design.

What works, what doesn’t work, and why some logos don’t seem to go out of style.

That said, I thought since I’m asked this question quite a bit (right there with “What should I call my new business?”) I thought I’d give you guys a detailed framework of how to make a logo for yourself whenever you start a new brand or a new business.

You’ll be learning:

  • Part 1: Getting Ideas for Your Logo
  • Part 2: Making Your Logo
  • Part 3: Mistakes you want to be sure you avoid

Part 1: Getting Ideas for Your Logo

When it comes to logos, you can either pay someone else to do them, rr, in true New Inceptions fashion, do it yourself quickly and inexpensively.

Either way you go, it’s best to give you or your artist some inspiration to work from. Something you can say, “I like this but I don’t like this”.

Your goal in this section is to simply give you or your artist pieces of previous work to work from – but not necessarily define what your logo is going to look like.

triple-self-portrait-19601

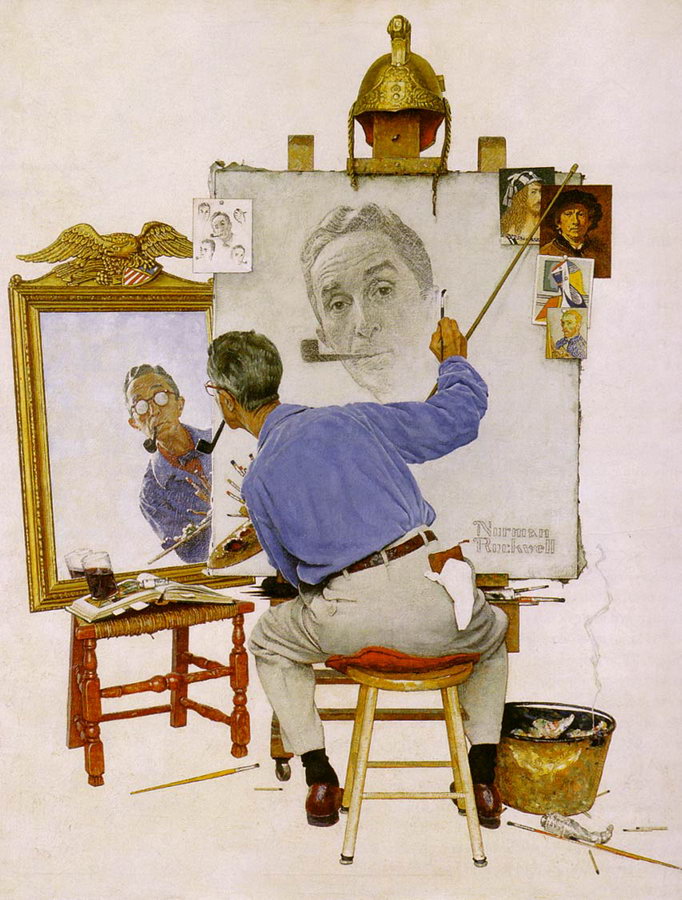
Among many other instances, artists are known to use this technique when they’re making portraits (just as Norman Rockwell’s Triple Self Portrait shows here). It’s called having a reference.

These logos that you’re going to be picking are those reference pics.

Here’s how you find reference pics (images):

  1. Go to Google Image Search
  2. Type in “reference image logos” (or the name of a favorite brand, or central point of your design + “logo”)
  3. Click an image you might want to use as a reference.
  4. When that image is highlighted, you’ll see an option to “View more”. Click that if you want to see more like the one you clicked.
  5. Save as many examples as you like. I try to aim for 15 or 20 logos when I’m doing this initial combing of images. If you luck out, you might find something like one of these:

multiple-logos

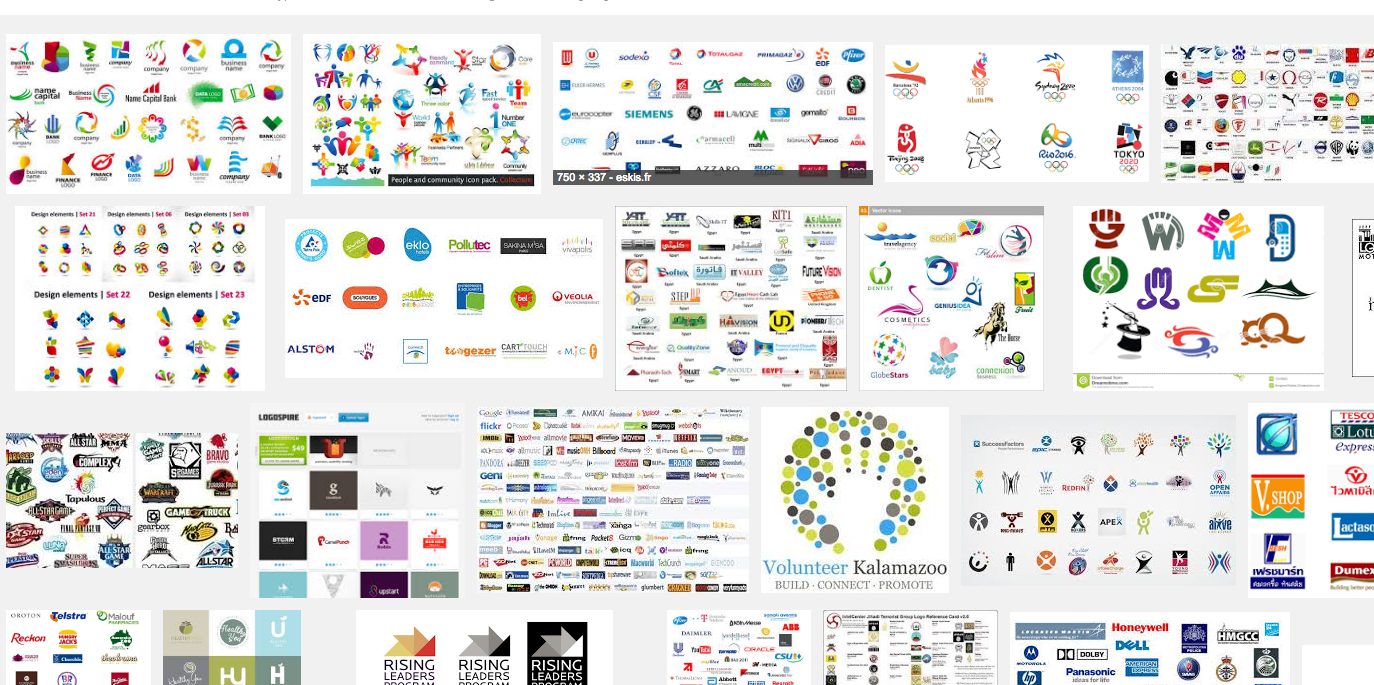
Here’s the link for this search.

Limiting Your Choices to Your Top 3 to 5 Choices

So, here’s the deal. You should currently have 15 or 20 images that you like. Something that you’ve just given a thumbs up to.

But we want to go deeper than that. We want to now start looking at logos that maybe you like some part of. Or how something is laid out. Or perhaps you like the font. Here are 5 criteria that you want to use in choosing which logos you want to (or your artist) to work from.


Simple and Flexible

You can go from being simple to complex, very quickly. Look at my 2nd rendition of my logo. It’s a logo, but it’s very complex. I was doing ok with the font, but it wasn’t clean. It was a hodge podge of ideas.

So, what I ended up being suggested to me on Fizzle was that I needed to clean it up. Start using my brand colors and just tighten all my concepts down. Oh, and don’t forget that the font needed to be simpler as well.

End result? Something someone doesn’t have to sit there and analyze – but yet included the compass, dreamcatcher, and a catchy slogan.


Appeal to Different Audiences

Here’s something else to consider. You don’t want to have a rigid design. Again, if you look at my 2nd version, there wasn’t going to be many ways I could use that design. While I might be able to float it on a blog, using it through social media in the profile squares might have been a bit of a pain. Again, simplifying the design allows me to use the letters “NI” for social media.


Design needs to be Versatile

To put this simply, you want to have the ability to use your logo in different situations. Does it look good online? Sure.

But how does it look on say a coffee mug, shirt, or a poster?

How does it look with different kinds of color? Grayscale?

At this point this is mainly opinion. So when you’re attempting to find your reference shots, keep these all in mind.


Be Unique!

Now, if the reference logos you’ve been thinking about using are too unique or cliche, this is where you drop them off.

How do you know if they’re too unique to use in your design?

Glad you asked!

Everyone knows the Coca-Cola logo – so don’t use it or anything that looks like it. Don’t use some design of an apple unless it’s with something else. No backward swooshes. Get the idea?

In other words,

  • Don’t Use Cliche Designs
  • Don’t Use Recognizable Fonts
  • Don’t Use Recognizable trademarks

how-to-not-have-a-unique-logo

Part 2: Making Your Logo

Now, you should have limited your selection of logos down to 3 to 5 different logos.

Just for an example, here are 5 that I limited my selection down to:

ideas-for-new-inceptions-logo

Next step: actually making your logo.

You want to get your hands on some sort of Graphic Manipulation software.

I use an antiquated version of Photoshop to do all of my work (CS5). It actually crashes from time to time. BUT you don’t need Photoshop to create an image from scratch.

In fact, there’s a free alternative called GIMP. GIMP has been around for a long time, but I’ve never actually used it! As a student back at Purdue, I was able to land a copy of Photoshop pretty inexpensively. Thank you student software rates!

Why did I opt for Photoshop instead of a free copy of GIMP? Mainly because GIMP wasn’t super user friendly. However, tt seems they’ve come a long distance since then.

If you want to check out using GIMP, here’s a tutorial I found for you.

Things to Consider When Making YOUR Design:

Make sure you logo has a story to tell. Meaning that it shows how and why you’re different.

Here’s how you do that and what I was thinking when I made my logo:


What is your business about?

New Inceptions is about helping people chase their dreams and make a living from that. Hence the dreamcatcher and the compass.


What kind of personalities are you trying to attract?

I want to attract people who feel like they’re trapped.  That they’re not using their fullest potential. So I’m appealing to all 4 personality types.

    • Use bright colors for the expressives.
    • Use boldness for the drivers.
    • Use the right slogan for the analyticals and the amiables.


Show that you incorporate thinking and meticulous ideology in your work.

When I redesigned my new logo, I made sure I considered proper proportion and symmetry. While some people might be super creative and use white space as part of their design, I instead opted to use what’s called a double entendre. It’s basically where you use two pictures in one. I combine the compass and the dreamcatcher whenever possible.

If your business involves activity, then you might want to consider showing that in your design.

Laila’s logo shows a woman’s silhouette doing a yoga pose and the tails of the letters seem to be growing as well. (Notice that these tails also give her a font that is highly customized.)

fitness-astronaut

And finally, remember that this is not about perfection. You don’t have to get it right the first time.

In fact, a ton of our favorite brands have done their own logo changes throughout the years:

changing-of-popular-brand-logos

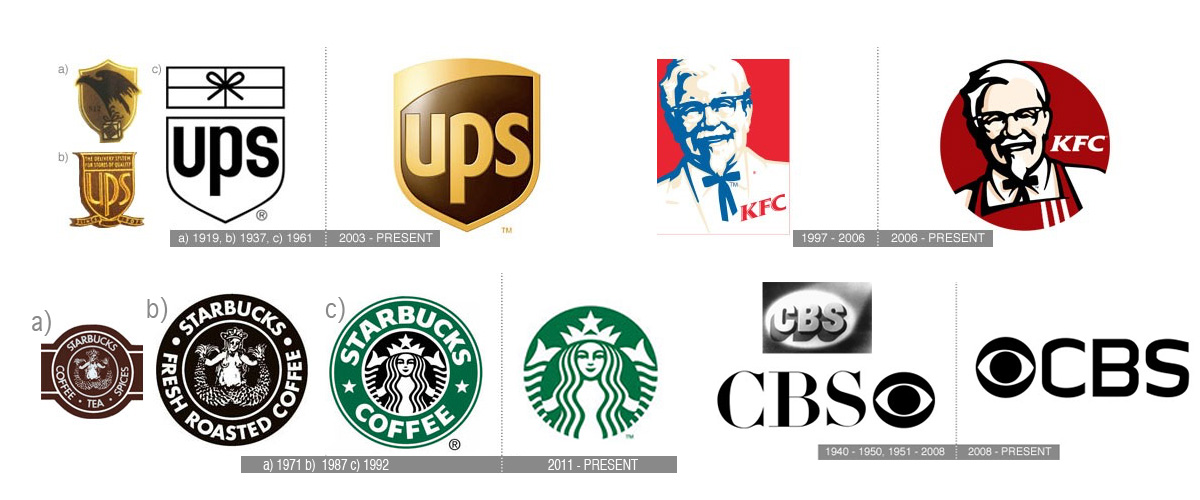
So don’t expect to be perfect with your first, second, or third design!

Part 3: Common Mistakes that Designers Make

Finally, here are a few pitfalls that you or your artist want to make sure you avoid as your developing your logo.

  • Don’t Over Innovate – The coolest logo isn’t specifically the most complex. Keep it simple!
  • Don’t Underestimate Custom Fonts/Typography – If you have the talent or know someone that can do design work with letters, let them go for it. I can imagine that my next logo will feature more of this.
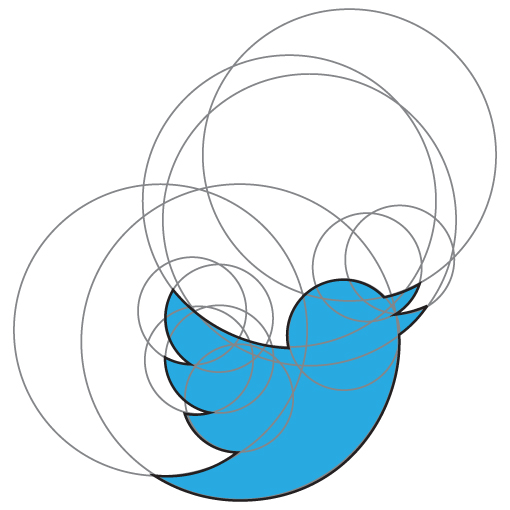
  • Don’t be predictable – Again, don’t use common elements in your design. If you do, perhaps do it in a way that’s unique! Here’s a cluster of circles that make the Twitter logo:twitter-logo-circles
  • Don’t use special effects in your designs – Don’t forget that we want our design to be flexible just like those that we used as reference. Special effects don’t lend themselves to coffee mugs and shirts too well!
  • Don’t constantly change your logo – You might have noticed that Facebook routinely changes their design and layout of Facebook. However, they never touch their logo. Don’t make it a habit to change your logo or colors regularly.

Wrap Up

So that’s how you make a logo – or at least how I’ve made mine and helped others do the same.

There’s a lot there. So here’s the short version:

  1. Find some non generic designs that you can get ideas from. Start with 10, 15, or 20 logos and bring it down to 3 to 5.
  2. Get some Graphic Manipulation Software – Can’t beat Photoshop, but GIMP is free.
  3. Create your logo using parts or ideas from other designs. But don’t copy directly. Use them as inspiration.
  4. Make sure your design tells the story of your business.

Think you’re ready to craft your new logo for your business but still have questions?

Leave your question in the comment section below. I’ll be personally reading and responding to all questions.

brilliance and business

AoL 049: From Homeless in High School to Expert Enabler and Community Builder with Mellissa Rempfer

There’s so many things we have to do as an entrepreneur. Either we do it ourselves or we pay someone else to do it.

If you’re just starting out on your path, you might not have the resources to pay for all the help you need.

How do you get things done if you need help on graphics or grammar checking? Maybe you need help getting through a mental block or getting a new perspective on your business? Do you have the resources to pay for all of that?

Probably not. Perhaps bartering is the answer. But where online can you do that?

That’s what today’s guest, Mellissa Rempfer has been able to foster in her group, Brilliance and Business.

In this chat, we talk about where the idea of the group came from and more about what sets it apart. We also get into how she got her start in doing big things early on, and the three instincts of the human condition and how those apply in life and business.

SPECIFICALLY, YOU’LL FIND OUT MORE ABOUT:

  • How Mellissa didn’t even realize she had hit the bottom even though she was homeless in high school. 11:05
  • How she moved from being homeless to going to college 16:19
  • Why she decided that she wanted to be a pediatric trauma surgeon. 18:41
  • Where the idea of a student center came from and how she was able to put all the pieces together to get it built on her campus. 21:17
  • What she did immediately after graduating. 29:33
  • When she felt it was time to start a business. 34:24
  • Her initial experience in coaching and how Brilliance and Business originally came about. 38:30
  • What Brilliance and Business is all about. 47:09
  • How she feels has helped her grow the group as well as it has? 53:55
  • How do the three instincts of the human condition play into what she does? 57:57
  • More about the implementation of these instincts in the group 1:05:55
  • What are some of the things that’s she’s looking forward to in the future 1:07:30
  • What three things she would like people to remember her by? 1:10:21
  • Three truths she wants to share with others? 1:10:36
  • Where she would run a non promotional ad and what would it say? 1:11:37
  • 3 Favorite Podcasts 1:14:04
  • What she would say to her 25 year old self? 1:17:40
  • When she thinks of success, who does she think of and why? 1:18:37
  • … and MUCH more!

Right click here and save-as to download this episode to your computer.

ITEMS and PEOPLE MENTIONED IN THIS EPISODE:

SHOW NOTE EXTRAS:

Tapping into and Embracing Your Brilliance:

Kim Eldredge and Mellissa talk about Mellissa’s book:

How to Communicate on Facebook:

Introduction to the Enneagram:

Thanks for Listening!

Thanks so much for joining us again this week. Have some feedback you’d like to share? Leave a note in the comment section below!

If you enjoyed this episode, please share it using the social media buttons you see at the top of the post.

Also, please leave an honest review for The AoL Podcast on iTunes! Ratings and reviews are extremely helpful and greatly appreciated! They do matter in the rankings of the show, and we read each and every one of them.

If you have any questions feel free to email them over via the email mentioned in the show or by our contact form.

And finally, don’t forget to subscribe to the show on iTunesStitcherSoundcloud, and/or Google Play Music. It’s absolutely free to do so.

A huge thank-you to you guys for joining us!

Cheers!

take control of your life

7 Ways to Stop Being a Victim and Take Control of Your Life

A video from this past winter of Gary Vee’s got me thinking. The world is full of victims. And really, much of the direction of the country as a whole is going because of how many people in their lives that they are a victim – more to the point – a victim of their circumstance. Here’s that video:

Just this past weekend, I had the opportunity to sit down with a friend of mine from the Muncie area. As we were talking, he made it clear that he felt that his place in life made it hard for him to progress in life. Having a disability from a past job and not feeling like he could be retrained to do something else due to his age, he seemed adrift in his career. Just bobbing up and down in the sea of life and letting whatever currents that be take him with them.

I asked him, “if you had an ideal life, what would it look like?”. He said “You know, I haven’t really thought about that because it seems like it would be too far out of reach.”

I then asked him, “How do you think that the Olympic athletes are there doing their thing? Do you think they thought that being there was out of reach?”

His response was, “No. But they had people that helped them get there. They knew the right people.”

“Interesting.”, I replied. The conversation continued after that for a bit… but I could tell that I got his mind spinning a bit.

Formal Education Can be a Waste of Time

Now, if you’re not familiar with the Muncie, Indiana area – it used to be full of manufacturing jobs. However, since those jobs have all but left the country, there are many people who are still displaced and trying to figure out what to do with their lives. (A bi-product of this loss of jobs has been the rise of drug use in the area – including, but not limited to, meth.)

When I worked at Ivy Tech for a few years, my students were mainly a mixture of kids just out of high school and these displaced individuals. I’m glad that they were there. Whether they were there because they got some money from the state to be there (school loans that might later hurt them) or they actually realized that education IS a way to move forward. I loved these adult learners – but I hated that I wasn’t getting the opportunity to teach them important things that would help them actually move forward in their lives.

Seriously. How is Algebra going to help them? They need a whole reworking of how they see the world. Not the knowledge of how to find the equation of a line drawn on a grid!

Even when I first went to college, I was hoping that it would teach me skills that I would actually be able to apply to having a successful life. Instead all I was taught was code, equations, and facts. While it applied to me getting a job, it never applied to real life.

When I graduated, I pretty much had the same perspective on life that I did when I entered. I just had a higher vocabulary. (Which, funny enough, ostracized me from everyday folks outside out of academia. Later, when I did start teaching at Ivy Tech, I had to become more relatable and adjust my speaking patterns again.)

I can attribute my new perspective on the world as starting during my active years in LTD. That was the first time in my life that I had positive and successful people around me. I learned from them how to start learning how to live a better life myself. And the biggest thing that I learned was that I needed to adjust my own victim perspective. (Soon, with the passing of my mom, I also realized that the mindset of a victim can actually kill. She had several things wearing on her at the time and anytime I hear people stuck in life with little options, I really feel their pain. It usually brings me back to what she was going through.)

7 Steps to Retaking Control of Your Life

So, how did having these people in LTD specifically help me get out of having a victim mindset? Well, you’re in luck. I’m going to share you a list of steps that I can look back on and see what I did to start getting to point where I am today.

Become aware and realize when you’re playing the victim card.

Like any other “normal” behavior, blaming others for your misfortunes can become a habit and even an addiction. Like any other addiction, we need to be able to admit that we need to make a change in our own life before we can actually do it.

Realize why you actually do it.

  • You might want attention and validation. You can always get good feelings from other people as they are concerned about you and try to help you out. On the other hand, it may not last for that long as people get tired of it.
  • You don’t have to take risks. When you feel like a victim you tend to not take action and then you don’t have to risk for example rejection or failure.
  • You don’t have to take the sometimes heavy responsibility. Taking responsibility for your own life can be hard work, you have to make difficult decisions and it is just heavy sometimes. In the short term it can feel like the easier choice to not take personal responsibility.
  • It makes you feel right. When you feel like the victim and like everyone else – or just someone else – is wrong and you are right then that can lead to pleasurable feelings.
  • As with any other bad habit (or addiction), being aware of what you’re actually doing is will give you the ability to start thinking about those actions rationally. It’s when you’re aware of your actual choice that you can start thinking about taking different actions.

It’s Ok to Not Be a Victim

Anytime we think about doing something different in our life, we always wonder what others in our life are going to think. If you’re a gamer, you’re going to wonder what your gaming buddies are going to think. If you’re an alcoholic, you’re going to wonder what your buddies at the bar are going to think. The list goes on.

Also realize that you’re going to struggle with it yourself. You may have spent hours each week with thinking and talking about how wrong things have gone for you in life. Or how people have wronged you and how you could get some revenge or triumph over them. This whole new thinking process is going to be new to you. It’s going to be tough, but in the end it’ll be worth it to be free.

Now you have to fill your life with new thinking that may feel uncomfortable because it is not so intimately familiar as the victim thinking you have been engaging in for years.

Take Responsibility for your Life.

Stop waiting on other people’s approval to live your life. As much as you might think growing up, you’re not your parents, and they’re not you.

Growing up, if we’ve had good parents, they’ve programmed into us that we’re capable of doing anything with our lives. However, over time we might start feeling that we’re not living to their standards. (I know that’s something that I’ve struggled with in the past.)

From this, we start developing self-esteem issues. We start believing that we’re totally capable of living a good life, but for whatever reason, it’s not happening.
We might lash out on other people, we might drown ourselves in other types of addictions to avoid the pain that we’re feeling.

This damages other vital parts of our lives: relationships, ambitions, and other achievements. Obviously, this isn’t a good thing.

Until we take take responsibility for our own lives, this pain of ours continues. If anything goes wrong in life, take responsibility for it – unless your life is literally threatened then you should probably blame the other guy. 😉

(Side note: Also forget what other people say if you’re having issues there. You don’t need to be part of a group that disrepects you as a person.)

Have Gratitude for What you do Have.

I can almost guarantee you that you’re probably upset about where you’re at in life – with something. You might have thought that you were going to be farther in life than you currently are. Maybe you thought you’d be married by now. Maybe you want to have kids and you don’t yet. Maybe you actually have a successful business now, but you don’t own the Jets yet (looking at you, Gary. 😉 )

The truth is that there’s a thing called “The Missing Tile Syndrome”. We all have it and need to deal with it regularly. The best way to deal with it is to appreciate that all the other tiles in our lives are in place. That maybe we have a loving family and that we have a good job to pay the rent or mortgage. Or that we can travel anywhere in the world that we want to at any time.

Having a journal can help immensely with this step.

Forgive Those who Trespass Against You.

At this point, you’re starting to realize that you’re not perfect. That’s great! But you also have to give others the benefit of the doubt too. The truth of the matter is that no one has time to worry about your life more than they worry about their own. So they’re going to piss you off from time to time because they’re just trying to do their thing.

Forgive those that cut you off in traffic. They might be having a really bad day. Forgive those that cut in line at the fair or Disney World – they might actually have a VIP pass. (Is that an actual thing?)

The point being is that you bring on this negative energy onto yourself when you have these feelings. You want positive energy and forgiving does that. Start thinking about other people’s perspective when they seemingly are picking on you. (Unless again if your life is ACTUALLY threatened… then you might want to go into self preservation mode.)

Turn your focus outward and help someone out.

There’s a saying, “People don’t care about what you know until they know that you care”. But the problem is that people really don’t know who you are (because why would you have ever shown them the real you?) or they don’t know you’re trying to make a change to be a better person.

Action speak more than words. So if you’re true intent is to ultimately feel that you’re not a victim, there’s nothing more that will show this than actually being of service to other people.

Really, when you’re known as being a server and later a servant leader, that’s when you really know you’re no longer a victim – you’re a victor.

Sometimes You’ll Need to Give Yourself a Break.

Sometimes you’re going to have relapses in your feelings about yourself and your new decisions. It’s part of what makes us human. In entrepreneurship, it’s called the entrepreneur emotion rollercoaster.

Sometimes you’re going to love what you do. Sometimes you’re going to wonder if it’s worth your trouble.

When I’m on the bottom of this rollercoaster, I’ll remind myself that I’ve done the work to come to this point and realize that this is who I am and no one can take that from me.

In your instance, you might simply need to realize that it’s not about being perfect. It’s about being happy. Sometimes other people are going to crap on you on rainy days. Just remember that they’ll get theirs and there’s nothing you should do to speed that process up because you’ll look bad in the process (again, unless it’s about actually surviving… then take them out or escape. We don’t want anyone suffering from Stockholm Syndrome).

Action Steps:

Below, I’d love to hear from you! Let me know how these work out for you if you get a chance to use them in your life too. Or maybe you’ve gone through a similar process? Let me know if I left anything out!

skill hack

AoL 047: How to Skill Hack and Stay Engaged In Your Creative Work with Stephen Robinson

On the show today, 2 friends and a host share what it’s really like learning for a living. That’s right, I said LEARN for a living.

What does mean? Well, I’m glad you asked!

Ginger joins me again in this one and we talk with one of her friends that she’s met in her travels – Stephen Robinson.

Stephen is founder of 52Skillz, a YouTube channel in where he discovers, learns, and shares a new skill weekly.

With so many “leading learners” out there, there’s a lot of conversation in how to do it.

While Stephen has had plenty of inspiration, he wants to make sure he does it his own way. He does it by one-upping people that are already out there.

So, is it as easy as it sounds? Or, as we ask him in the chat: How do you stay engaged and up-to-date in your work?

The answer, and the story of where 52Skillz came from is what we lay out for you today on the show.

SPECIFICALLY, YOU’LL FIND OUT MORE ABOUT:

  • How Stephen chose his major in college 10:42
  • How to not get your business lost in the ether of the internet. 14:37
  • Where the idea for 52 Skillz came from. 17:00
  • Does Stephen feel he was inspired by Tim Ferriss? 19:46
  • Does he feel like there’s any favorite skills that he’s learned? 21:53
  • Where he would recommend that people start if they wanted to start learning skills quickly. 29:02
  • How Stephen has a constant flow of content coming for his YouTube channel. 33:13
  • Does he do his own video production? 36:08
  • How he has the ability to work on a passion project while at the same pay the bills. 40:58
  • What’s a strategy that Stephen would recommend to transfer to do something they love? 44:34
  • How does Steven stay engaged in his work? 48:17
  • How he got ready for his TEDx talk 58:33
  • What is Stephen’s thoughts on having deadlines? 1:00:22
  • What’s Stephen looking forward to in the near future? 1:03:24
  • 3 Favorite Influencers 1:07:00
  • 3 Truths to share with others 1:07:18
  • What’s the message he’d put on social media? 1:08:42
  • What’s one thing that he used to believe but doesn’t anymore? 1:09:38
  • … and MUCH more!

Right click here and save-as to download this episode to your computer.

ITEMS and PEOPLE MENTIONED IN THIS EPISODE:

SHOW NOTE EXTRAS:

Ginger comes through on her promise in learning to juggle!!:

Stephen’s TEDx Talk:

How He Prepped for his TEDx Talk:

Zephan Blaxberg Interview of Stephen:

Alexis Hillyard’s “Stump Kitchen” Crossover:

My Favorite Video of 52 Skillz:


Thanks for Listening!

Thanks so much for joining us again this week. Have some feedback you’d like to share? Leave a note in the comment section below!

If you enjoyed this episode, please share it using the social media buttons you see at the top of the post.

Also, please leave an honest review for The AoL Podcast on iTunes! Ratings and reviews are extremely helpful and greatly appreciated! They do matter in the rankings of the show, and we read each and every one of them.

If you have any questions feel free to email them over via the email mentioned in the show or by our contact form.

And finally, don’t forget to subscribe to the show on iTunesStitcherSoundcloud, and/or Google Play Music. It’s absolutely free to do so.

A huge thank-you to you guys for joining us!

Cheers!


Melinda Enfinger

AoL 045: Helping Veterans find Real Estate, Mentoring, and Business Success with Melinda Enfinger

Taking a passion and making money from it takes the form of many types of careers.

For me, you guys know I love helping people do actually that. That’s why my focus in grad school was entrepreneurship. I love discussing and thinking about it… turning around and helping someone else out through the process.

This session’s guest is no different. Melinda Enfinger is a veteran of the Marines who found herself in the reality industry afterwards, and now finds herself helping veterans find their own property – plus other benefits that they might not know about.

In this session, Laila and I talk with Melinda and find out about her years of service (especially being a female Marine in the 90’s), how she got into working with veterans, and some of the commonly missed benefits that veterans might not be aware of when it comes to reality.

If you are veteran (or know one) and you don’t have a great relationship with the Veterans Services Office, then you should definitely listen to this and see if knowing Melinda might be worth your while!!

SPECIFICALLY, YOU’LL FIND OUT MORE ABOUT:

  • Why Melinda joined the Marines and what her experience was like during her tenure. 9:00
  • How she got into reality upon leaving the Marines. 14:11
  • How the transition went from being in Marines to being a civilian 15:47
  • Why she liked being involved with reality for as long as she’s been in it. 17:15
  • What some of her favorite stories are when it comes to helping veterans with reality. 21:25
  • How she found herself doing copywriting work. 22:43
  • What she belives makes for good copy. 28:30
  • When it’s better to use “we” vs “you” when writing blog posts. 32:49
  • How she feels being in the military pushed her into coaching and consulting 35:05
  • What kind of people does she like working with the most? 37:53
  • What some of her favorite wins are in her coaching. 42:02
  • What are some things that married military couples should pay attention to when thinking about buying a new house. 50:07
  • Why Melinda believes that veterans need to take advantage of their local Veteran Service Centers 52:58
  • What are some influencers in Melinda’s life 55:37
  • 3 Truths she’s learned that she’d share with others 56:08
  • What ad would she put out into the world? 56:47
  • What would Melinda say to her 30 year old self? 58:27
  • Who comes to mind when she thinks of the word success? 1:02:10
  • …and MUCH more!

Right click here and save-as to download this episode to your computer.

ITEMS and PEOPLE MENTIONED IN THIS EPISODE:

SHOW NOTE EXTRAS:

Interview with Shawn Mahdavi of Realbies:

How to be Authentic Online:

Mecklenburg County, NC Veterans Services Office (Just Google your county for yours or Use this link):

22Kill and the Honor Rings:

22kill

22Kill Intro:

Excerpt of the Glenn Beck Program featuring Jacob Schick of 22kill (Part 1):

Jacob Schick of 22kill (Part 2):

Entirety of the Glenn Beck Program for that day.

Additional interview with Jacob Schick:

Thanks for Listening!

Thanks so much for joining us again this week. Have some feedback you’d like to share? Leave a note in the comment section below!

If you enjoyed this episode, please share it using the social media buttons you see at the top of the post.

Also, please leave an honest review for The AoL Podcast on iTunes! Ratings and reviews are extremely helpful and greatly appreciated! They do matter in the rankings of the show, and we read each and every one of them.

If you have any questions feel free to email them over via the email mentioned in the show or by our contact form.

And finally, don’t forget to subscribe to the show on iTunesStitcherSoundcloud, and/or Google Play Music. It’s absolutely free to do so.

A huge thank-you to you guys for joining us!

Cheers!

DIY Business Site

Getting Started on the Web (Part 2): Basics of Setting Up WordPress for your DIY Business Site

In the last post, we looked at some of the options that are out there in building your own business site.

Just as a recap, there are those that are fairly simple to use but still require you to know how to actually use the editors in them when you’re in.

Wix, Squarespace, and Kajabi are some of the most common “easy to use” site makers out there. However, all of them come at a price that is above what you’d pay for simple hosting and a WordPress install.

Kajabi, being the most expensive, comes with all the bells and whistles that you’d have to add on elsewhere.

Wix is free to start from, but you have to add parts that cost a premium to do certain things. (Collecting emails for an example.)

Squarespace, I haven’t personally used, but it’s almost three times as much as I pay at Hostgator for my plan. And knowing that I could easily throw up a theme (additional software that makes a WordPress install look nice) that I only have to buy once, then it just didn’t make sense to me to use.

The Basics of Hosting:

When it comes to installing a WordPress based site, there’s a few things you need to do before actually installing it.

Find and subscribe to a Host:
First and foremost, our first step is to figure out who you want to be your host. I use Hostgator, Pat Flynn is well known for using BlueHost, and others use other providers.

The plan I get with Hostgator is the Baby Plan. It has most of the stuff we need. (Be sure to go through my affiliate link so you can save on your subscription if you go with Hostgator.)

Essentially a host does a couple of things that we’re interested in:

Holds your site’s contents (including WordPress and your creative content).
The actual local address of your site. (You point your domain name here.)
Where to find any email addresses associated with your domain name.

Once you get access to your new host, you should have some sort of dashboard in the back to utilize your new subscription with. For now, most things in there won’t be of too much interest to us. However, I wanted to get you a video that shows a little bit more about what Hostgator uses as their dashboard. It’s called cPanel.

Setup Your Domain:

Your domain is the name of your site. For example, my site’s domain is newinceptions.com. I registered it originally at GoDaddy. They’re known for cheap domain registration – but not necessarily hosting (even though they provide it).
GoDaddy isn’t the only domain register I’d suggest. While GoDaddy has good first year registration prices, NameCheap is another place you can get cheap domains and they’ll continue to be relatively inexpensive after your first year.

Also, another thing they give for free is the ability to block the name and location of the person who registers the site. This is something that you have to pay additional for on GoDaddy and other domain registries. This is a big selling point if you want to keep your privacy.

Once you register with whomever you choose (there’s others out there too!), you’ll have to give your register the nameserver’s addresses. Usually there are two in your cpanel (if you go with Hostgator, it will be on your bottom left near the bottom – they’ll look something like nsXXXX.hostgator.com and nsYYYY.hostgator.com.)

Here’s a video that will get you started in this section.

Setting Up Your Professional Email:

It’s simple to say why this is important. What’s the point of having a website if you’re email is [email protected] or something similar? Wouldn’t it be better to be [email protected]

Most hosts will allow you to host your own domain based email on your share of the server. What they fail to tell you is that whenever you are checking emails, you’re usually using up what’s called a “Process”. With my service from Hostgator, there are 25 processes that I can use. Each open email account will use up to 4 of these processes. Why? It’s a little detailed.

However, there are other providers out there that you can get your email hosted with. All you have to do is prove you own your site and then tell the host that you want to get your email from that secondary email host. There’s different ways of doing that, so I won’t drop into that too much here.

However, there’s two big players in this department: Google and Zoho.

Google everyone knows and trusts (to an extent anyway!). When you get your professional email with them, then you can use it to login into other Google applications such as Google Docs, and Google Calendar.

However, there’s a price to pay for Google. I believe it’s like 5 or 10 bucks each month. Plus additional fee for other emails you get.

At one point Google was free. When they started charging, Zoho got in the act to host business emails. They host up to 10 for your domain for free. Each email address can save 5 gigs of data on their account. (As a hack, I tend to backup all my emails on a secondary Gmail account.)

Both work similarly. So, unless you only want to have one address for everything, then I’d go with Zoho for your business email and use Google for your personal email, apps, calendar and possibly a backup account.

Here’s one video that should help you figure this process out.

WordPress Ins and Outs:

Initial Setup:

Each host will be different when it comes to setting up WordPress. Some you can install with a few clicks. Others will be a little more manual.

Hostgator again comes through here in that it makes it relatively easy to setup. There’s a Quick install feature that takes about 5 clicks and 6 fill in the blanks to finish. (The linked video is a bit old – but should do the trick.) It will send you an email when it’s done installing and you’ll be ready for the next step.

Inside WordPress (the Backend):

Once you have WordPress installed, you’ll want to familiarize yourself with the Dashboard. You can typically reach the dashboard by going to yoursite.com/wp-admin. You’ll have to supply a login and a password. This should be in the email you get once the install is done.

You’ll notice several tabs. Two that I want to bring to mind right now are Appearance and Plugins.

The Appearance tab is where you’ll find your themes. There are free ones available through this tab, and others that you’ll have to buy at sites like Themeforest. Mine is called Enfold. There are plenty of other choices. You just need to search around and see what fits your site’s needs. For example, another one I use is Gameplan for the America Multi-Sport site.

My biggest recommendation with themes is to make sure it’s responsive (most new ones are) and that it is built around an editor. Enfold has it’s own native one, while Gameplan uses a 3rd party solution. Having a theme built around an editor will make it easier for you to work on your future site.

Also, when you have a premium theme installed, more than likely it will also add another tab. Make sure you click on that tab and explore everything that’s in there. There will be plenty of options and things for you to go through and modify.

(Note: If you go with Enfold, you can actually import a demonstration site and modify it to how you like it. Otherwise, you’ll have to start with scratch. But this is no different at this point from if you had used Squarespace, Wix, or Kajabi.)

Here’s a video that shows more of the backend of WordPress with Enfold being enabled as the theme.

The Plugins tab is next on the list. When you are done installing your basic theme, you’ll want to start turning some things on that will protect and optimize your site. This is where you’ll do that. A few plugins that I always use on all of my sites is Akizmet, a firewall plugin (like Wordfence), and a cache “optimizer” (like WP Super Cache). Also, be sure to install a backup plugin like UpdraftPlus so if you’re ever hacked or lose access to your site, you can install it elsewhere.

You can continue to add free and premium plugins to your heart’s content to do different jobs in your site and outside of your site. Some will only be on the backend (like I’ve mentioned already), others will be on the front end. Those plugins might show contact forms, social media buttons, or image rotators. (The end user will see these plugins working – but hopefully won’t realize it.)

The next two tabs that I want to call attention to are Pages and Posts.

The pages tab will take you to all the pages that your site has. One of those pages is the Homepage – the page you see when you first access your site. Other pages then can be linked off of this page to discuss everything you want to. Typical ones you might find in the online business world include “About”, “Contact”, “Resources”, and “Blog”.

Speaking of blogs, the post tab comes into play here. Each post is sort of like a page, but they’re not part of the main skeleton of your site. If you think of posts as limbs and branches of a tree, then your leaves are the posts. Posts can consist of all kinds of media. They can be text based, photo based, or even be where you find someone’s podcast. Right now you’re looking at a post as you read this. (Is that an example of being meta?)


Outside WordPress (the Frontend):

Ok. So now that we have ourselves somewhat familiar with the inside, let’s look at what everyone else is going to be looking at.

This is where it’s important to get an idea of what it is that you want to create. So from here, I’d suggest finding three sites that look like something that you’d want to have. That way you know what to design.

If you’re using Enfold (or another theme) and already created a demo site – then really all you should be doing is tailoring smaller details with your native editor. (This is what I’d recommend doing, by the way. :))

However, if you didn’t use a demo site to start with, then you’ll be starting from scratch. Again, look at other sites that you like. Start with with your homepage and start playing with your editor and start creating some pages!. In Enfold, it’s called Avaya Layout Builder.

Here’s a video in how you can use it.

Note: Before I forget, you might notice that there’s a section on the right that is static. On my site, for example, I have a Facebook section, some social media buttons, and a place to subscribe to the Newsletter. These are called Widgets. You can find these as a sub selection of the Appearance Tab. For more information on Widgets – feel free to check out this video.

A trick that I do is have two tabs open. One side views the frontend of the page you’re working on, and the other is looking at the backend. Work on the backend, hit preview. Opens up another tab. Do you like what you did? Hit Update. Then check your work again on the original frontend page to make sure that the change actually took hold.

Here’s a video to show you what widgets and sidebars are all about.

Once done with that, check out this video on how widgets work in Enfold. 

Wrap Up and Action Steps:

I know that this is a ton of info to throw at you. But really, it’s barely touching the surface. I just wanted to put something up that might get some of you going on your websites.

I do hope to get a course up that will go more in depth into this in the future. But for a quick start, I thought I’d go ahead and get you all started at least in the right direction if a lack of a site has been keeping you back.

If you get stuck, remember what I said in the first one. Make YouTube your friend! If you have a question, search for it on Google or, better yet, find it on YouTube. Tons of tutorials there.

If you can’t find or don’t understand the answer you find, you know how to get ahold of me!

Repurposing Content Roundup

Repurposing Content Roundup: How to Use Your Content Sawdust

As online content makers, we all put a ton of work into the content that we create. That work takes time. And unless you’re some 5th dimension alien being that has no problem traveling in the 4th dimension (which is time), then you probably don’t have the minutes in a day to make new piece after new piece of content for each platform you’re on.

However, that’s not too say you should just throw one piece out there, forget about it and move on to the next. On the other hand, it also doesn’t mean that you should go out there and post “20 posts on Facebook a day”.

There is a happy medium between making one post and moving on to the next (which is highly ineffective) to repeatedly saying “Hey everyone! Check this out!” 10+ times a day (which is another highly ineffective way to get your message out there).

What’s a way to produce that content in a way that isn’t overwhelming? And what’s the correct amount?

Content “Sawdust”

In a video that came out last week, Gary Vaynerchuck dropped this word to describe macro-content. While I had heard of his strategy from Brendon Burchard, in how he uses quotes for Instagram and Facebook, I hadn’t really thought about applying it to anything else than that platform.

Essentially content sawdust is little snippets from the main content. As Gary said, when people think of .gif pictures, that is a form of sawdust. When you see a trailer for a movie, that consists of sawdust. Heck, you might even be able to think of sawdust as that thing that Paul Harvey used to do before he did his Midday NEWS or The Rest of the Story.

(Speaking of Paul Harvey, Mike Rowe – yes, from Dirty Jobs – is starting a new podcast that Paul Harvey was an inspiration for. Check that out here!)

Know Thy Platform

Before you go posting content sawdust, you need to know how to work the platform that you’re posting that sawdust on.

For example, the topic of this post came to me last week from one of my favorite Facebook Groups: The Expert Community. If you don’t know about Facebook Groups and how they’re helping online business in 2016, then you have a few things to learn about how Facebook currently works.

In the old days, before Pages, Groups were the place where people could come together and discuss things that they had an interest in. I know that when I was going to Purdue, that I made several off the wall ones. So did some of my friends.

One of the ones that I was proudest of was called the 10/22 Club. It started of as a club at Purdue who members had their birthday on October 22nd. Very elitist, right? Haha.

Back then, you could search for people by birthday. And, if I recall correctly, I had 25 members at one point. However, by this point, it had grown beyond Purdue itself.

Eventually, Pages did come into the picture, and when they did – groups essentially stopped having a purpose. If you had a Page, you could essentially create a profile for an organization, game, or anything else that wasn’t just one person. Dogs, cats, birthday clubs… you name it.

Just like you can on your own wall, a Page could post something and people who liked that page would see it on their feeds. Groups never had the ability to really do this.

Technically, that’s still the way Pages work. Unfortunately for us business owners, things changed again about 2 years ago. To get more than 10% of your followers to see what you posted on a Page, you have to pay for it – regardless of what the Page is being used for. I call this the Page Pay to Play. It’s very one direction.

In retaliation(?) to this, groups started making a comeback. However, instead of just passively posting things on your page wall, with groups, you have to pay attention to the rules of the group. Many don’t support posts to external links. They fear that the use of external links will drive people away from the group. A greedy owner of the group might see this as a threat.

Personally, I feel the more the merrier. As long as posts are relevant to the group and are offering free value to the members – it’s a great thing to do. However, if spam starts entering then, you might just have to draw some lines. Simply come up some rules in which the community has to follow. That’s why big groups with 1000+ members often have themes and rules when it comes to what’s going on each day.

Another thing about groups is that you actually have to engage and become connected to the people in the group. To do this well, I think you really have to think of it more as a community and not so much of an authority page.

That said, I think Facebook has become community driven. You just have to be willing to friend up to the max of 5000 people if you want it to work that way for you. Otherwise, go with the Page Pay to Play method.

That all being said, you’ll have to figure out how to use the platform that you want to connect with your audiences on. Do you use Instagram? What works over there? Do you use Snapchat? How does that work? Periscope? Again – figure out the best way to package the sawdust to those audiences.

If you want some specific examples of how you can package sawdust from your blog posts, specifically, you can check out Pat’s examples here.

Correct Amount to Post

If you feel I haven’t answered this part indirectly already, then I’ll go ahead an answer it directly here. The correct amount to post is… ::drumroll::

…up to you.

Brendon posts 4 times a day. He uses 2 posts that he made that morning. I’ve seen him do 2 images on Instagram and 2 on Facebook. Specifically he says his times are 7am, 11am, 3pm, and 7pm for those posts. He posts many of his YouTube videos on Sunday (who does that?).

Pat posts several times a day. I wasn’t able to pin down exactly other than a 9am post, a midday post, and an after work post. Generally speaking he does a good job of posting on the weekends a couple of times. However, when he’s traveling – he kinda goes through all the platforms. On his trip to the Food Blogger Conference in Salt Lake City this past weekend, he ended up Instagramming a pic of his luggage during the day. Then later, he did a ‘scope and then a couple of Facebook Live posts in the evening. As well as saying thanks to the people he had dinner with and the tours he got though the rest of the weekend.

Gary posts… well, I haven’t been able to pin it down yet. But I’m assuming it’s similar – AND he has a guy shadowing him for DailyVee. So, it’s not necessarily a one man band. If you’re really interested in when his accounts post (or anyone) – make an account on IFTTT and create a recipe that monitors certain accounts and posts the message on a spreadsheet. Then from there you can see patterns after a week of monitoring.

Action Steps:

So this week, as you’re creating your new epic posts. I want you to start going through some of the work you’ve already done. See if there’s anything in there that you might be able to say to yourself “man, that was good!”. Quote it and repackage it.

So many people don’t reuse the evergreen content they have. If you’re on a budget (like me) use what’s free and what you can afford to spend. If you have some extra funds to try some other stuff, get a subscription to Edgar or something similar. Spend some time coming up with a daily and monthly plan of how you can line up content. Make themed weeks. If that goes well, start doing themed months!